Table of Contents
Objective:
Get started with colab and python. Begin producing simple visualizations of data and images.
Deliverable:
For this lab, you will submit an ipython notebook via learningsuite. This notebook will have two parts:
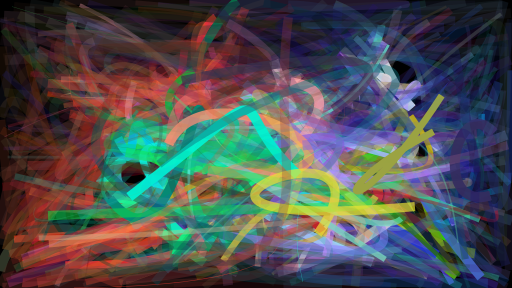
Part 1: Your notebook should generate a random image. We will run this notebook 5 times; it should generate 5 different, moderately complex images. Each image should be 512 x 288. Have fun with it!
The resulting image could, for example, look like this:

Part 2: You must play with the Tensorflow playground neural network, and figure out how to create a classifier that successfully classifies the “spiral” dataset.
A colab notebook teaching you how to use colab notebooks
Grading standards:
Your notebook will be graded on the following:
- 20% Successfully turned in a notebook with working code
- 35% Random image with 50 random elements
- 35% Image indicating tensorflow success
- 10% Tidy and legible figures, including labeled axes where appropriate
Description:
Throughout this class, we will be using Google's colab environment to develop and test our deep neural networks. This consists of ipython notebooks and a standardized python distribution. For this lab, you must create a google account (or use one you already have), start up colab, and write a simple python program in it.
As described above, the notebook should do two things: 1) generate simple random images, and 2) display an image that you generate using the Tensorflow playground.
For part 1, you can generate any sort of random image that you want – consider random lines, random curves, random text, etc. Each time the program is run, it should generate a different random image. Your image should have at least 50 random elements (they can all be the same type, such as random lines, and can be created in a loop). We won't count the number of elements; this is just to encourage you to create random images with moderate complexity (ie, you can't just generate randomly colored pixels, as in the example below).
For part 2, you should visit the Tensorflow playground (see link above), and play with different settings. Most of it will be unfamiliar, but don't worry – you can't break it!
Once you have a working classifier, take a screenshot. Then use your colab notebook to display that image in-line.
Starter code:
Here's some starter code to help you generate an image. The nbimage function will display the image inline in the notebook:
import IPython.display
import PIL.Image
import numpy as np

# A simple function to display an image in an ipython notebook
def nbimage( data ):
    IPython.display.display(PIL.Image.fromarray(data))


# create an image consisting of random colors

data = np.random.rand(512,512,3) # a 512x512 image, with 3 color channels (R,G,B)

# by default, rand creates floating point numbers between [0,1].  We need to convert that to 8-bit bytes between [0,255]
data = (255*data).astype('uint8')

# display it!
nbimage( data )
Hints:
The following python functions might be helpful:
import matplotlib.pyplot as plt

plt.legend
plt.xlabel
plt.ylabel

plt.tight_layout

