Table of Contents
Objective:
Get started with pytorch. Begin to understand the basic boilerplate code of most pytorch programs.
Deliverable:
For this lab, you will submit an ipython notebook via learningsuite. This lab will be mostly boilerplate code, but you will be required to implement a few extras.
NOTE: you almost certainly will not understand most of what's going on in this lab! That's ok - the point is just to get you going with pytorch. We'll be working on developing a deeper understanding of every part of this code over the course of the next two weeks.
A major goal of this lab is to help you become conversant in working through pytorch tutorials and documentation. So, you should feel free to google whatever you want and need!
This notebook will have three parts:
Part 1: Your notebook should contain the boilerplate code. See below.
Part 2: Your notebook should extend the boilerplate code by adding a testing loop.
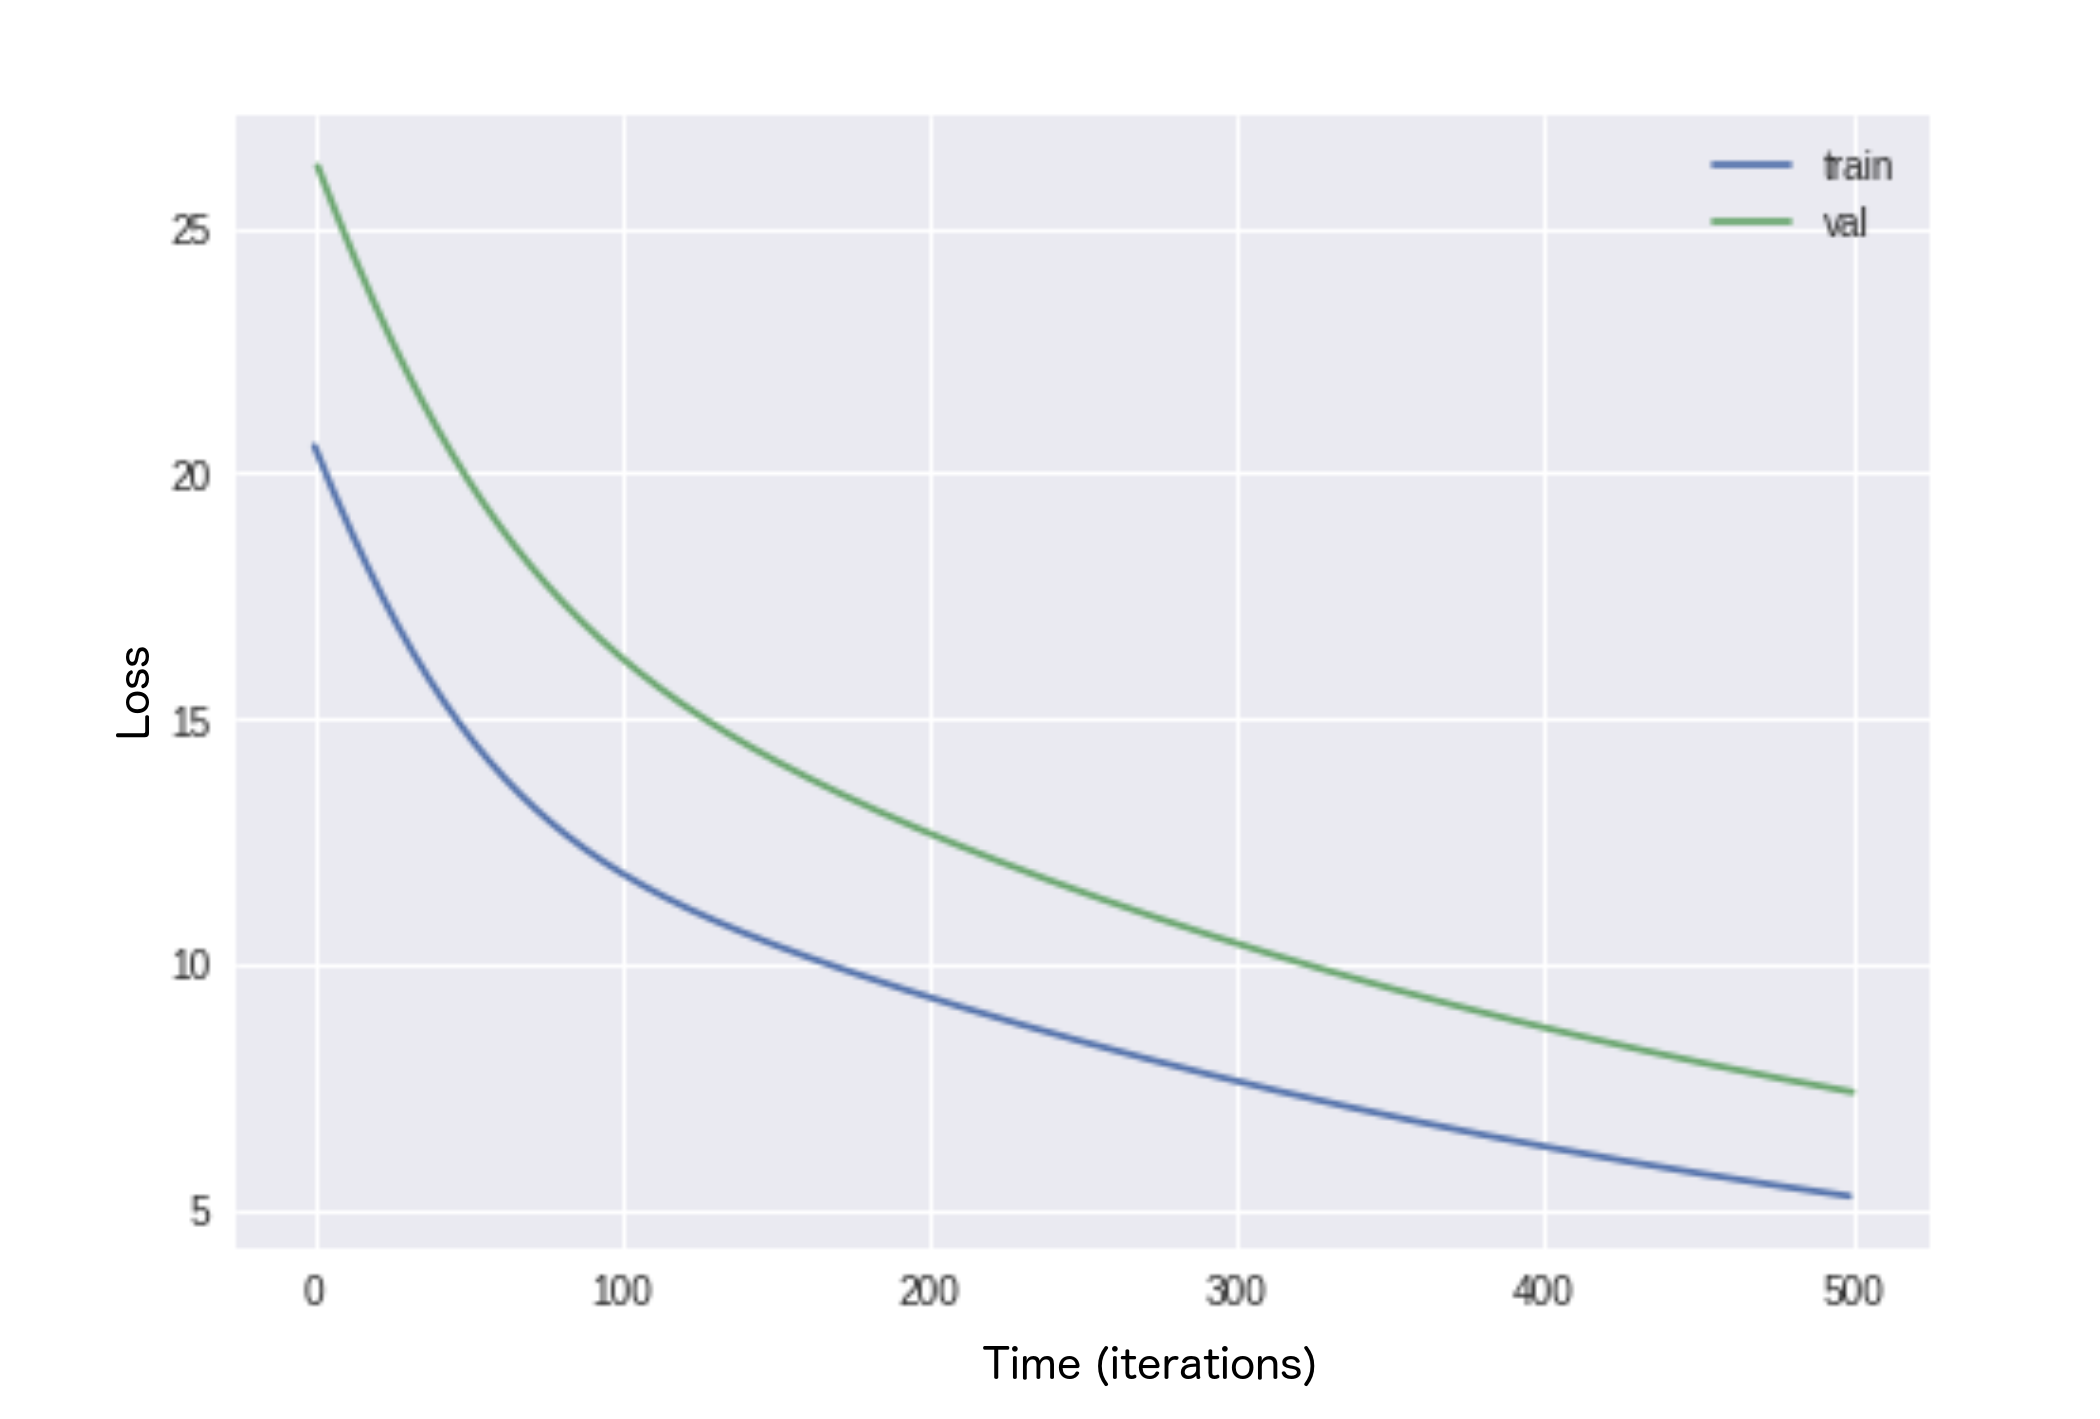
Part 3: Your notebook should extend the boilerplate code by adding a visualization of test/training performance over time.
The resulting image could, for example, look like this:
See the assigned readings for pointers to documentation on pytorch.
Grading standards:
Your notebook will be graded on the following:
- 50% Successfully followed lab video and typed in code
- 20% Modified code to include a test/train split
- 20% Modified code to include a visualization of train/test losses
- 10% Tidy and legible figures, including labeled axes where appropriate
Description:
Throughout this class, we will be using pytorch to implement our deep neural networks. Pytorch is a deep learning framework that handles the low-level details of GPU integration and automatic differentiation.
The goal of this lab is to help you become familiar with pytorch. The three parts of the lab are outlined above.
For part 1, you should watch this video, and type in the code as it is explained to you.
The video is here lab 2 tutorial video
A more detailed outline of Part 1 is below.
For part 2, you must add a validation (or testing) loop using the FashionMNIST dataset with train=False
For part 3, you must plot the loss values and demonstrate overfitting.
The easiest way to do this is to limit the size of your training dataset so that it only returns a single batch (ie len(dataloader) == batch_size, and train for multiple epochs. In the example graph above, I set my batch size to 42, and augmented my dataloader to produce only 42 unique items by overwriting the len function to return 42. In my training loop, I performed a validation every epoch which basically corresponded to a validation every step.
In practice, you will normally compute your validation loss every n steps, rather than at the end of every epoch. This is because some epochs can take hours, or even days and you don’t often want to wait that long to see your results.
Testing your algorithm by using a single batch and training until overfitting is a great way of making sure that your model and optimizer are working the way they should!
Part 1 detailed outline:
Step 1. Get a colab notebook up and running with GPUs enabled.
Step 2. Install pytorch and torchvision
!pip3 install torch
!pip3 install torchvision
!pip3 install tqdm
Step 3. Import pytorch and other important classes
import torch
import torch.nn as nn
import torch.nn.functional as F
import torch.optim as optim
from torch.utils.data import Dataset, DataLoader
import numpy as np
import matplotlib.pyplot as plt
from torchvision import transforms, utils, datasets
from tqdm import tqdm

assert torch.cuda.is_available() # You need to request a GPU from Runtime > Change Runtime Type
Step 4. Construct
- a model class that inherits from “nn.Module”
- Your model can contain any submodules you wish – nn.Linear is a good, easy, starting point
- a dataset class that inherits from “Dataset” and produces samples from https://pytorch.org/docs/stable/torchvision/datasets.html#fashion-mnist
- You may be tempted to use this dataset directly (as it already inherits from Dataset) but we want you to learn how a dataset is constructed. Your class should be pretty simple and output items from FashionMNIST
Step 5. Create instances of the following objects:
- SGD optimizer Check out https://pytorch.org/docs/stable/optim.html#torch.optim.SGD
- your model
- the DataLoader class using your dataset
- MSE loss function https://pytorch.org/docs/stable/nn.html#torch.nn.MSELoss
Step 6. Loop over your training dataloader, inside of this loop you should
- zero out your gradients
- compute the loss between your model and the true value
- take a step on the optimizer


